1. Character 객체 만들어보기
1-1. 부모 클래스 Character
예전 UE4 때는 큰 설명이 없었던 것 같은데)UE5에서는 부모 클래스에 대해 아래와 같이 설명이 작성되어 있다.
우리는 “걸어다니는 기능이 포함된 폰 타입”이 필요하기 때문에 캐릭터를 부모 클래스로 선택하여 구현할 것이다.
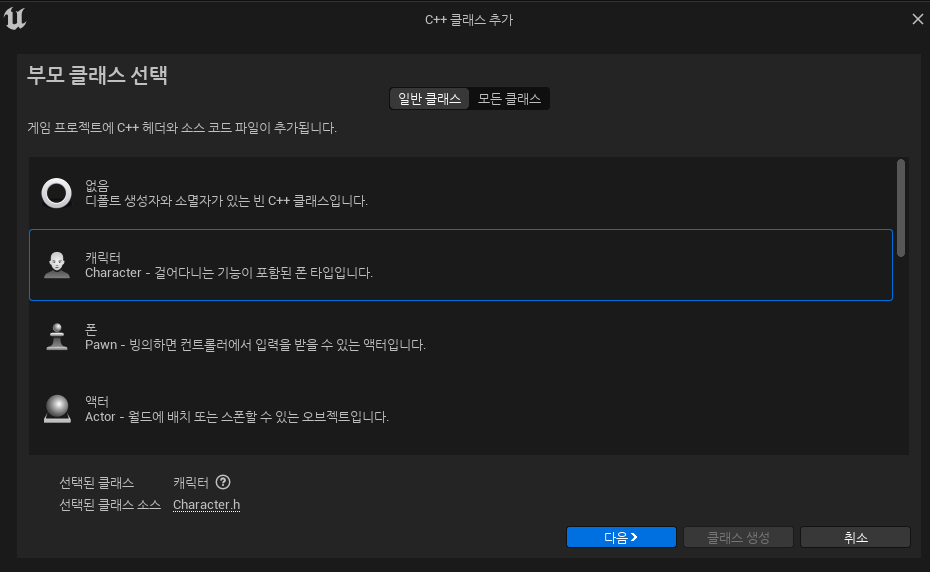
.cpp /.h 파일을 만들어보면 부모 클래스로 ACharacter 클래스가 되어 있는 걸 확인할 수 있다.
그리고 캐릭터 설명에서 “걸어다니는 기능이 포함된 폰 타입”이라 되어 있는데 적힌 것처럼 폰 타입이기 때문에 ACharacter는 APawn을 부모 클래스로 두고 있는 것을 볼 수 있다.

1-2. Blueprint 클래스 만들기
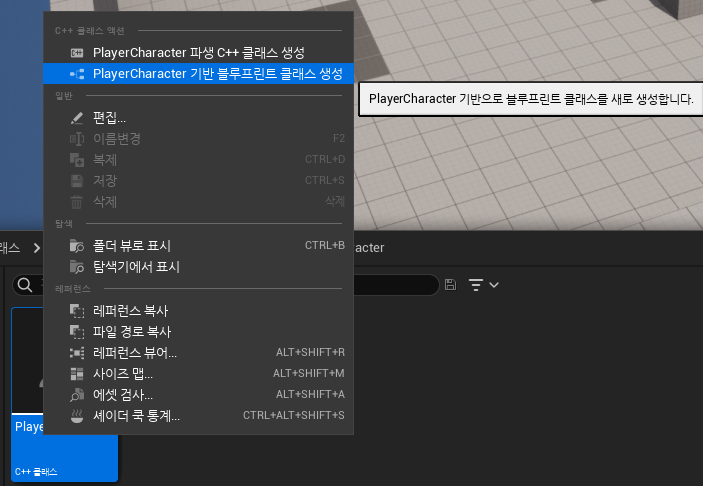
만든 소스 파일을 우클릭하면 아래와 같이 “*** 기반 블루프린트 클래스 생성”을 볼 수 있는데 이를 클릭해서
폴더에 넣어주자.
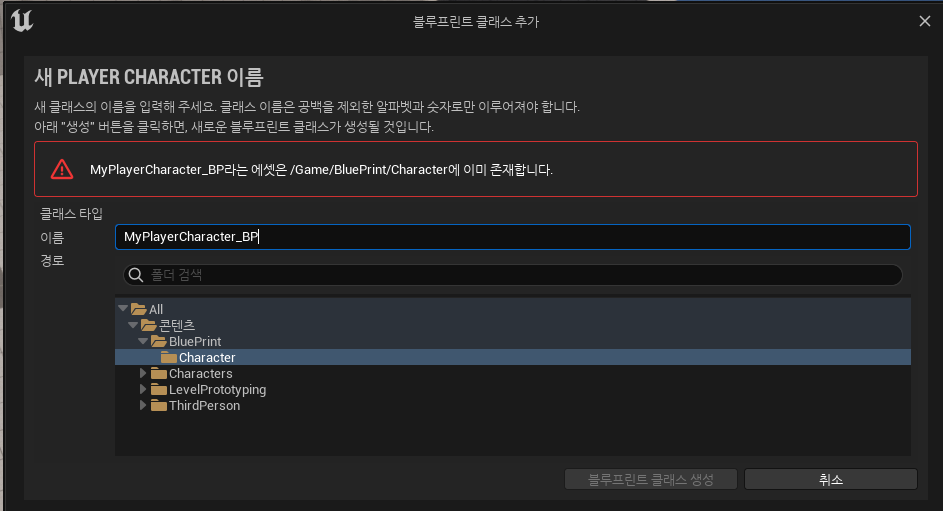
특정 소스 파일의 blueprint클래스임을 알 수 있게 하기 위해 ~***_BP 라는 형식으로 생성했다.~ BP_***으로 수정했다.
1-3. Skeletal Mesh 붙이기
만든 Blueprint 클래스를 더블 클릭하면 컴포넌트들을 확인할 수 있는데 그 중 메시를 클릭하고 우측 “디테일” 창을 보면 Skeletal Mesh를 선택할 수 있는 곳을 볼 수 있다.


SK_Mannequin을 선택해주면 아래와 같이 노출되는 것을 확인할 수 있다.
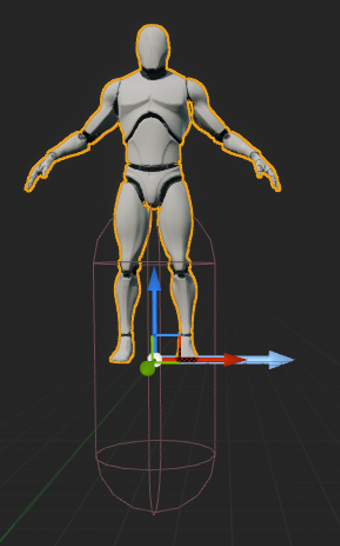
2. C++ 로 Mesh 위치 Init하기
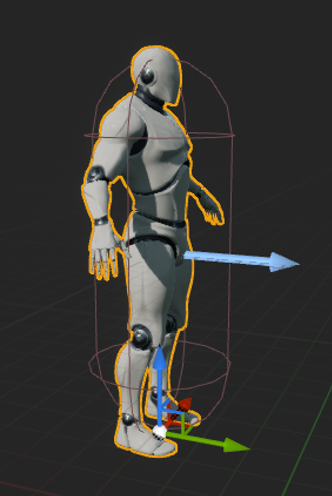
위 이미지를 보면 SK_Mannequin Mesh가 캡슐 컴포넌트에 비해 너무 높게 위치해있다.
Transform의 값을 Position(0,0,-90), Rotation(0,0,-90)을 주면 아래 캡쳐 이미지처럼 캡슐 컴포넌트에 맞출 수 있다.

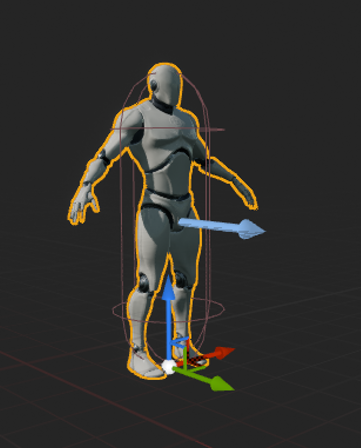
하지만 매번 BP를 만들 때마다 해주기엔 너무 번거롭다.
그래서 C++로 이 작업을 처리해서 BP를 만들 때마다 처리되게 해보자
2-1. Mesh 변수 찾기
일단 Character를 부모 클래스로 해서 만들었을 때 Mesh가 기본으로 생성되어 있었다.
그러므로, ACharacter class에 Mesh에 대한 정의가 있다는 것을 알 수 있는데 class ACharcater에 보면 아래와 같이 Mesh가 정의되어 있다.
1
2
3
4
5
6
7
8
9
10
11
class ENGINE_API ACharacter : public APawn
{
private:
	/** The main skeletal mesh associated with this Character (optional sub-object). */
	UPROPERTY(Category=Character, VisibleAnywhere, BlueprintReadOnly, meta=(AllowPrivateAccess = "true"))
	TObjectPtr<USkeletalMeshComponent> Mesh;

public:
	/** Returns Mesh subobject **/
	FORCEINLINE class USkeletalMeshComponent* GetMesh() const { return Mesh; }
}
즉, GetMesh()를 통해 USkeletalMeshComponent를 가져올 수 있음을 알 수 있다.
2-2. Position 변경하기
Position 먼저 변경을 해보자면,
BP에서 Position은 로컬 좌표로 되어 있다.
그러므로, 코드에서도 로컬 좌표로 넣어주면 되는데 코드는 아래와 같다.
1
GetMesh()->SetRelativeLocation(FVector(0.f, 0.f, -90.f));
USceneComponent::SetRelativeLocation
2-3. Rotation 변경하기
Rotation도 동일하게 로컬 값으로 설정해주자
1
GetMesh()->SetRelativeRotation(FRotator(0.f, 0.f, -90.f));
2-4. SetRelativeLocationAndRotation
추가로,
SetRelativeLocation / SetRelativeRotation의 정의를 보면 SetRelativeLocationAndRotation를 사용하는 것을 알 수 있다.
1
2
3
4
5
// SetRelativeLocation의 정의부
FORCEINLINE_DEBUGGABLE void USceneComponent::SetRelativeLocation(FVector NewLocation, bool bSweep, FHitResult* OutSweepHitResult, ETeleportType Teleport)
{
	SetRelativeLocationAndRotation(NewLocation, RelativeRotationCache.RotatorToQuat(GetRelativeRotation()), bSweep, OutSweepHitResult, Teleport);
}
1
2
3
4
5
6
7
8
9
// SetRelativeRotation 의 정의부
void USceneComponent::SetRelativeRotation(FRotator NewRotation, bool bSweep, FHitResult* OutSweepHitResult, ETeleportType Teleport)
{
	if (!NewRotation.Equals(GetRelativeRotation(), SCENECOMPONENT_ROTATOR_TOLERANCE))
	{
		// We know the rotations are different, don't bother with the cache.
		SetRelativeLocationAndRotation(GetRelativeLocation(), NewRotation.Quaternion(), bSweep, OutSweepHitResult, Teleport);
	}
}
그러므로 아래와 같이 코드를 간단하게 수정할 수도 있다.
1
GetMesh()->SetRelativeLocationAndRotation(FVector(0.f, 0.f, -90.f), FRotator(0.f, 0.f, -90.f));
3. 컴파일해서 적용하기
에디터의 우측 하단을 보면 컴파일 버튼이 있는데 클릭해서 컴파일하자

그럼 Live Coding이 돌면서 성공적으로 컴파일이 될거고 BP를 보면 정상적으로 변경되어 있는 것을 확인할 수 있다.